

How to Create a Diaper Cake in a Few Easy Steps - Cricket Island Style

1) Gather your supplies: Take a peek at the Momma-To-Be’s registry to see what brand of diapers she prefers. You want these to be usable, not wasteful! Choose 2-3 packs depending on size. We prefer to make a three tiered cake. Size 2 on the bottom row, size 1 for the middle and a newborn size bundle on the smallest top tier, since the average full term baby will only actually be in newborn size diapers for a brief time. Patterns and pictures don’t matter, the diapers will be completely covered. You will also need rubber bands, an empty paper towel roll, and thick ribbon (again, color doesn’t matter, it will all be covered). Now is the fun time, choosing the theme for the cake, and the gifts for the baby! Look at our suggested collections for pieces that perfectly match and compliment one another for a quick and easy way to choose a color and design theme.
2) Roll your diapers: Lay each diaper flat and roll it into a tight burrito, securing each diaper with a rubber band. No pins or glue, these will be completely safe and ready for use when baby arrives.
3) Make your cake: Once all your diapers are rolled start with the largest size 2 diapers and gather them around the base of the empty paper towel roll standing upright. Keep gathering until the cardboard base is completely covered to form the base layer and then secure tightly with a ribbon. Move to the next layer with the size 1 diapers and build out from the middle tier leaving about 2 inches from the bottom tier, securing with the ribbon once again. Next is the top tier with the newborn size diapers, repeat gathering until leaving about 2 inches once again.
4) Decorating the Diaper Cake:
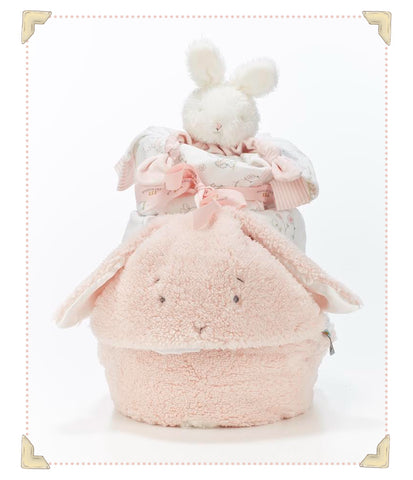
a. Base: For the cake that is pictured we covered the base with our best-selling Blossom Hooded Blanket. We folded the blanket in a triangle with the hood and bunny face on the top and wrapped it around the base of the cake. Tuck the top of the blanket around the cake and slightly under the second layer. Secure it in the back with a few large diaper pins.
b. Tier Two: The second layer is covered with our Growing Like a Weed Milestone blanket. This is a swaddle, and picture-perfect milestone photo blanket in one, and includes stickers to place on the blanket or on baby’s outfit. Once again wrap the blanket around the diaper layers and tuck in the top and bottom of the layer. We suggest NOT securing this layer with pins. The blanket is large enough to tuck around without poking any holes in the silky soft bamboo muslin fabric.
c. Top Tier: the top tier is covered with the perfect newborn baby clothing essential, the Tutu Delight Knotty Gown. We love this gown because it is super soft, and makes diaper changes a breeze! Just untie the knot to change baby’s diaper, and then tie it back up when done! Lay the gown out flat and fold in half length-wise. Wrap the gown around the tier and tuck under the bottom. Secure with large diaper pins if needed. The top will be a little messy, but that’s okay. That will be covered with the ever-important topper! You can also tie a pretty piece of ribbon around this layer, like the ribbon that is included with the hooded blanket, or any other ribbon of your choosing.
d. The Topper: The topper is the perfect way to decorate and add another fun gift. Here we topped the cake with our Blossom Bunny Knotty Friend, but any Bye Bye Buddy or Buddy Blanket, Wee or Tiny Sized stuffed animal, or Silly Buddy (a pacifier holder and lovey in one) would work just great as well.
5) Add the finishing Touches: Move the hood and bunny face up and around to your liking and secure with more pins if needed, now your diaper cake is ready to be the perfect baby shower center piece, and useful gift all in one!

If you make a diaper cake with any of our suggestions we would love to see it! Please share and tag us on social media @bunniesbythebay on Instagram and @BunniesBTB on Facebook. Be Sure to hashtag #bunniesbythebay and #givegladdreams!